Monitoring aircraft via ADS-B on OS X
I recently set up an ADS-B monitoring rig on a Mac Mini at home. This post documents the process I went through to allow monitoring aircraft and feeding information to several flight tracking websites.
Part of the Project Logs series.
Update: The emulated Raspberry Pi setup described in part of this port turned out to be unstable for long-term use.
I now recommend simply buying a dedicated Raspberry Pi for this application.
The vast majority of people who want to track aircraft with ADS-B and cheap SDR will do with a dedicated Raspberry Pi and FlightAware’s PiAware software. I already have a Mac Mini running 24/7 at home, close to a window, and so I wanted to run my monitoring directly on OS X.
This post documents the process I went through to get this working, on OS X 10.11.6. The process — particularly the networking and emulation steps — may be different on other macOS versions. This turned out to be a bigger challenge than I anticipated; it took the better part of a Saturday. Tracking aircraft on OS X is easy enough, but reporting positions to FlightAware direct from OS X is not. Before you go down this path, I recommend skimming the entire post.
This post assumes you have some high-level familiarity with ADS-B and MLAT, and you have the capability to work on the terminal with OS X and Linux.
Radio Hardware
I have an RTL-SDR already, but I use it for various projects and I didn’t want to dedicate it to this application forever. I chose to buy a FlightAware Pro Stick Plus, which includes a purpose-built 1090MHz band-pass filter.
Find the lat/lon and elevation of your antenna
If you find your house on Google Maps, right-click, and select “What’s Here?” you can copy the exact latitude and longitude of your home.
Then, to find the exact elevation above sea level of my antenna, I used this app. I set my phone at the base of the antenna and waited a few minutes until the altitude number had settled to a steady state.
Keep this information handy throughout the process; you’ll need it several times.
Homebrew
This process requires the Homebrew package manager for OS X.
Installing dump1090
dump1090 is the core software in this setup; it receives radio data from the SDR and decodes ADS-B messages. I chose to use mutability’s dump1090 fork, which includes a number of feature improvements and bugfixes (the original dump1090 is somewhat out of date), plus a better web UI:
- Run
brew updateand thenbrew install librtlsdr pkg-config - Choose a directory where software will be placed. Since this is an unattended Mac Mini, I just cloned the repository into my home directory. Run
git clone git@github.com:mutability/dump1090.git - Change into the
dump1090directory and runmake. You should soon have a dump1090 executable in the current directory. - Connect the SDR USB device to the Mac (if you haven’t done so already; I connected mine first thing, and it worked fine.)
- Run
mkdir -p /usr/local/var/dump1090-mut-data - Run
./dump1090 --interactive --net --lat <YOUR LATITUDE> --lon <YOUR LONGITUDE> --modeac --mlat --write-json /usr/local/var/dump1090-mut-data - Confirm that planes are showing up on the terminal, and that data files have appeared in
/usr/local/var/dump1090-mut-data
Running the dump1090 web UI
dump1090 used to have a web server built in, but it now requires an external server. I chose nginx, since I’m already familiar with it.
Run brew install nginx, then write the following config to /usr/local/etc/nginx/servers/dump1090:
# Allows access to the static files that provide the dump1090 map view,
# and also to the dynamically-generated json parts that contain aircraft
# data and are periodically written by the dump1090 daemon.

server {
    listen 8081;
    root /Users/YOUR-USERNAME/dump1090/public_html;
    index gmap.html;

    location /data/ {
        alias /usr/local/var/dump1090-mut-data/;
    }
}
Run brew services start nginx to start nginx and keep it running as a service.
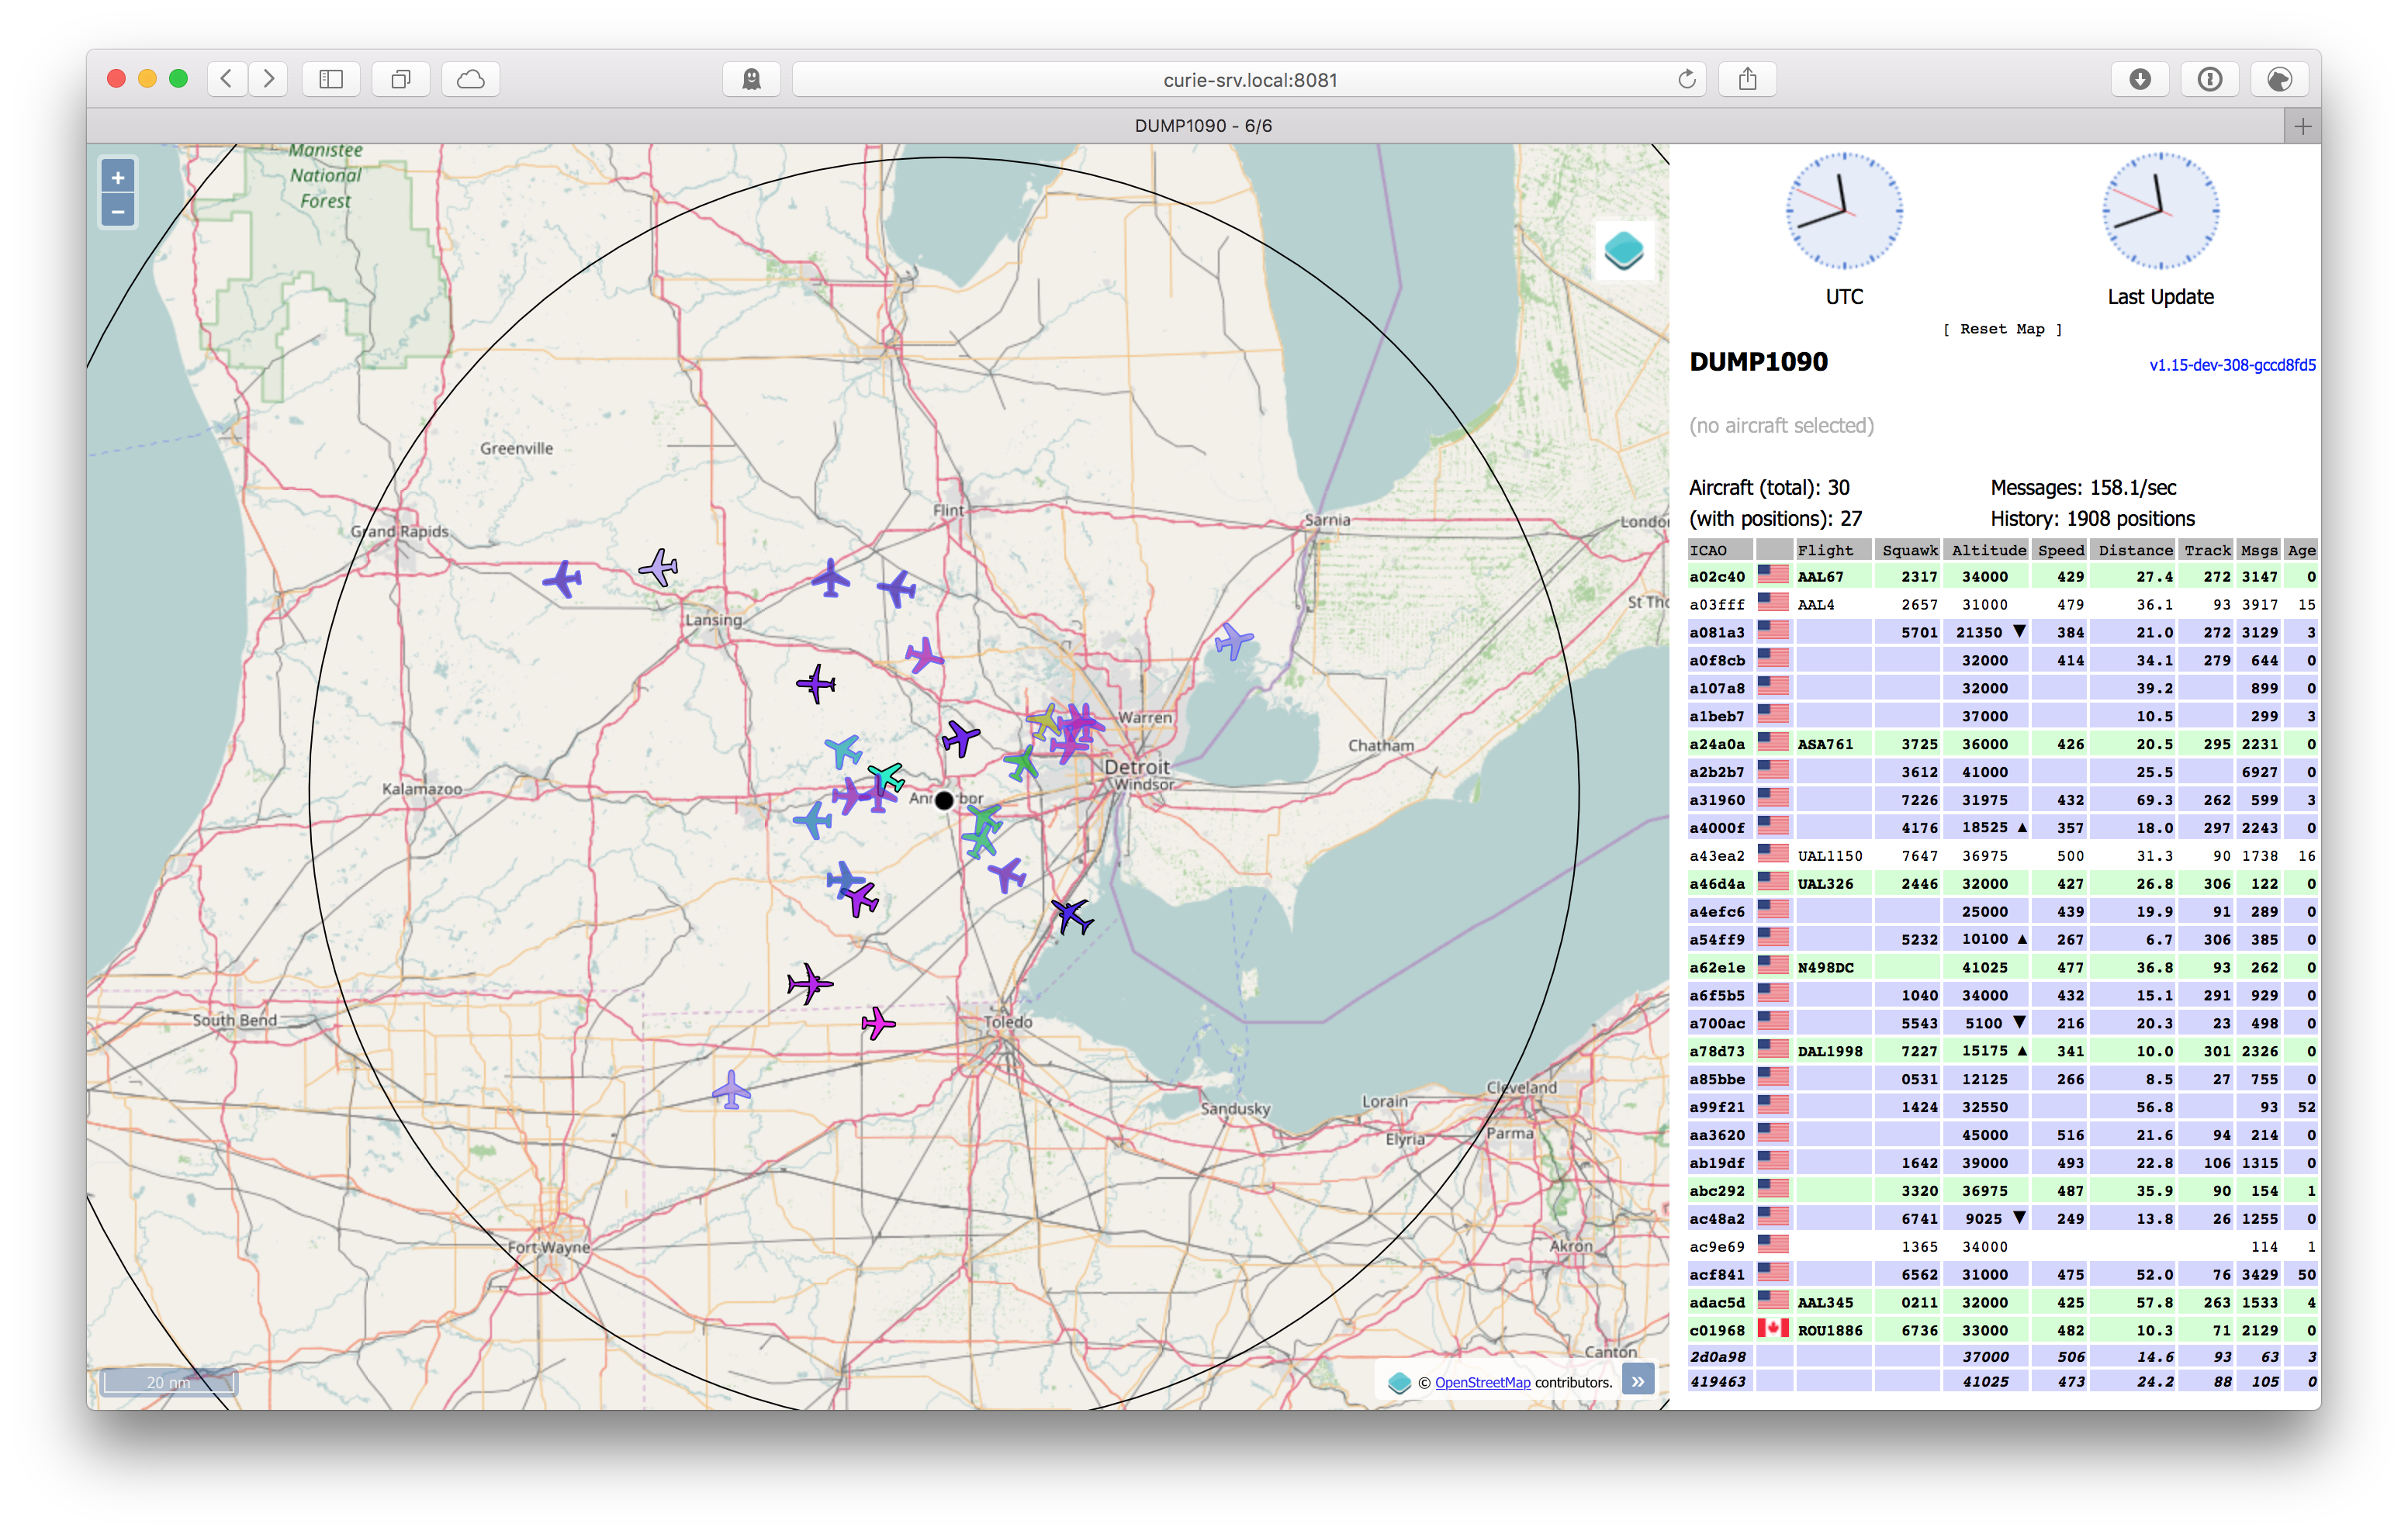
Verify that you see the dump1090 web UI when visiting localhost:8081 (from the host Mac), or MAC-HOSTNAME.local:8081 from elsewhere.
Feeding Plane Finder
To feed Plane Finder:
- Install Plane Finder Feeder as you would any Mac application
- Configure it, using
127.0.0.1:30005as the data source, and entering the latitude/longitude gathered earlier.
The Plane Finder feeder should start automatically on login.
Once you receive an email from Plane Finder, register for a sharing account. That welcome email will have some additional useful information.
The Plane Finder feeder will give you a nice real-time status display on the local network:
Feeding FlightRadar24
FR24 seemingly doesn’t have a good reputation in the community, but it’s possible to feed it via this setup:
- Run
mkdir -p /usr/local/var/log/fr24— this is where you can tell FR24 to put its logs - Install FR24 feeder as you would any Mac application
- Let it configure its feed automatically. Tell it to store logs in
/usr/local/var/log/fr24. - In System Preferences → Users and Groups, select your user add the FR24Feed application to the list of applications to start at login.
Once you receive an email from FlightRadar24, you can use the signup page for those who share ADS-B to get a free Business account. That email will have some other useful information as well.
Feeding FlightAware (with an emulated Raspberry Pi)
Feeding FlightAware is noteworthy because they will give you MLAT results, improving your local dump1090 web UI. It’s challenging, though; there is no Mac software available to feed FlightAware. After digging through the code for piaware and the related tools, it became clear that I didn’t have the patience to adapt it to run natively on OS X.
Update: This solution turned out to be unreliable for long-term use, and I do not recommend using a Pi emulator to deploy anything important.
So I decided to run an emulated Raspberry Pi on the Mac. That emulated Pi could run PiAware and talk to the dump1090 instance running on the host Mac. This requires QEMU, so:
Run brew install qemu — at this time, this command resulted in installing QEMU 2.8.0.
After about an hour trying to get QEMU to run Raspbian Jessie Lite, it became clear I didn’t know enough about QEMU to make this work myself.
Here’s what worked:
- Download this Raspberry Pi Emulator from SourceForge.
- Run it a couple times, until a QEMU emulator actually comes up. (The first two or three times you run it, it will download some components from the Internet).
- SSH into the emulated Pi (
ssh pi@localhost -p 3122) and, on the Pi, runsudo shutdown -h now. Wait for the Pi to shut down. - Quit QEMU.
- Open the “Raspberry Pi Emulator” application bundle. Copy both the kernel and disk image from
Contents/SharedSupportto a new folder elsewhere (I used~/piaware-vm).
Now we have a working emulator to use! Next we’re going to set it up so the Pi shows up as its own machine on your local network.
Bridging the Pi VM onto the local network
First, run brew install Caskroom/cask/tuntap which will install tuntap for OS X.
Open System Preferences → Network. Click the gear icon at the bottom of the network interfaces list, select “Manage Virtual Interfaces…”, add a “New Bridge…”, associate it with your Ethernet connection, and call the bridge bridge1.
(Thanks to bitfunnel.net for publishing these directions, which include a helpful screenshot! Archived here in case it goes away.)
Write the following script to ~/piaware-vm/scripts/tap-up: (update bridge1 if you called your bridge interface differently)
#!/bin/sh

TAPDEV="$1"
BRIDGEDEV="bridge1"

ifconfig $BRIDGEDEV addm $TAPDEV
Write the following script to ~/piaware-vm/scripts/tap-down: (update bridge1 if you called your bridge interface differently)
#!/bin/sh

TAPDEV="$1"
BRIDGEDEV="bridge1"

ifconfig $BRIDGEDEV deletem $TAPDEV
Make those scripts executable: chmod +x ~/piaware-vm/scripts/tap-*
Choose a random MAC address starting with 54:54:00 and use it in place of 54:54:00:12:34:56 in the command below.
Now, switch to the ~/piaware-vm directory and run: sudo qemu-system-arm -name "piaware" -kernel kernel-qemu -cpu arm1176 -m 256 -M versatilepb -serial stdio -append "root=/dev/sda2 panic=1 rootfstype=ext4 rw" -drive file=2016-02-26-raspbian-jessie.img,index=0,media=disk,format=raw -net nic,macaddr=54:54:00:12:34:56 -net tap,script=./scripts/tap-up,downscript=./scripts/tap-down.
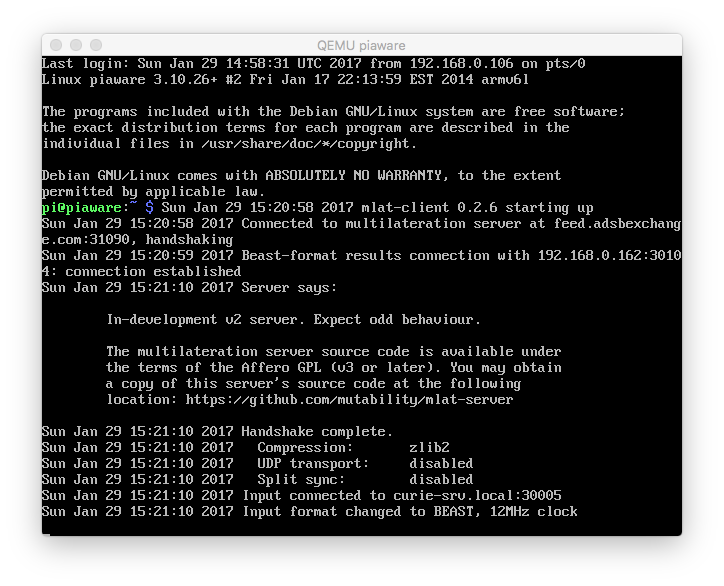
A QEMU window should appear and boot Raspbian! SSH into it: ssh pi@raspberrypi.local (the default password is raspberry).
To change the Pi’s hostname to piaware, use sudo nano /etc/hostname and sudo nano /etc/hosts. (See Renaming your Raspberry Pi for details.)
While editing /etc/hosts, remove the localhost entry for IPv6. This works around a piaware bug; see this discussion for details. After these edits, my hosts file looks like:
127.0.0.1	localhost
::1			ip6-localhost ip6-loopback
ff02::1		ip6-allnodes
ff02::2		ip6-allrouters

127.0.1.1	piaware
Installing PiAware
Now, to install PiAware on the Raspberry Pi VM, SSH into it and run:
wget http://flightaware.com/adsb/piaware/files/packages/pool/piaware/p/piaware-support/piaware-repository_3.3.0_all.deb
sudo dpkg -i piaware-repository_3.3.0_all.deb
sudo apt-get update
sudo apt-get install piaware
Configure it, substituting the host Mac’s name for MAC-HOSTNAME:
sudo piaware-config mlat-results-format "beast,connect,MAC-HOSTNAME.local:30104 beast,listen,30105 ext_basestation,listen,30106"
sudo piaware-config receiver-host MAC-HOSTNAME.local
sudo piaware-config receiver-type other
sudo piaware-config allow-manual-updates yes
sudo piaware-config allow-mlat yes
Reboot the emulated Pi (sudo shutdown -r now), wait for it to boot, SSH back in, and confirm that piaware seems to be up and running:
# verify that your custom config settings look good:
sudo piaware-config

# verify the piaware service is up:
systemctl status piaware

# see how piaware is doing:
piaware-status
Assuming dump1090 is still running on the host Mac, piaware-status should print:
PiAware master process (piaware) is running with pid X.
PiAware ADS-B client (faup1090) is running with pid Y.
PiAware mlat client (fa-mlat-client) is running with pid Z.
Local ADS-B receiver (dump1090) is not running.

no program appears to be listening for connections on port 30005.
faup1090 is connected to the ADS-B receiver.
piaware is connected to FlightAware.

got 'couldn't open socket: connection refused'
dump1090 is NOT producing data on localhost:30005.
(The last error is okay; remember, dump1090 is running on the host Mac, not on the emulated Pi itself.)
Claim your new PiAware on FlightAware. FlightAware will then send you an email. On their website, configure your FlightAware profile and the settings for this Pi, particularly the receiver location and elevation. Then restart PiAware, while SSH’d into the Pi: sudo systemctl restart piaware.
Making the Pi’s disk bigger
FlightAware helpfully let me know that the disk on my Pi was 96% full. I had to do the following — which requires a Linux computer — to resize it:
First, shut down the Pi (sudo shutdown -h now, when SSH’d into the Pi). Wait for it to shut down, and quit QEMU.
On OS X, make the raw disk image bigger (we’ll call the new image here piaware.img): cat 2016-02-26-raspbian-jessie.img /dev/zero | dd bs=4096 count=1572864 >piaware.img
Restart QEMU with this new image — remember to point it to the new piaware.img — and use fdisk to update the partition table. SSH into the Pi, and sudo fdisk /dev/sda. I roughly followed this guide to delete and recreate the partition, as follows:
Command (m for help): p
Disk /dev/sda: 6 GiB, 6442450944 bytes, 12582912 sectors
Units: sectors of 1 * 512 = 512 bytes
Sector size (logical/physical): 512 bytes / 512 bytes
I/O size (minimum/optimal): 512 bytes / 512 bytes
Disklabel type: dos
Disk identifier: 0x0cf63fa8

Device     Boot  Start     End Sectors  Size Id Type
/dev/sda1         8192  131071  122880   60M  c W95 FAT32 (LBA)
/dev/sda2       131072 7870463 7739392  3.7G 83 Linux


Command (m for help): d
Partition number (1,2, default 2): 2

Partition 2 has been deleted.


Command (m for help): n
Partition type
   p   primary (1 primary, 0 extended, 3 free)
   e   extended (container for logical partitions)
Select (default p): p
Partition number (2-4, default 2): 2
First sector (2048-12582911, default 2048): 131072
Last sector, +sectors or +size{K,M,G,T,P} (131072-12582911, default 12582911):

Created a new partition 2 of type 'Linux' and of size 6 GiB.

Command (m for help): p
Disk /dev/sda: 6 GiB, 6442450944 bytes, 12582912 sectors
Units: sectors of 1 * 512 = 512 bytes
Sector size (logical/physical): 512 bytes / 512 bytes
I/O size (minimum/optimal): 512 bytes / 512 bytes
Disklabel type: dos
Disk identifier: 0x0cf63fa8

Device     Boot  Start      End  Sectors Size Id Type
/dev/sda1         8192   131071   122880  60M  c W95 FAT32 (LBA)
/dev/sda2       131072 12582911 12451840   6G 83 Linux


Command (m for help): w
The partition table has been altered.
Calling ioctl() to re-read partition table.
Re-reading the partition table failed.: Device or resource busy

The kernel still uses the old table. The new table will be used at the next reboot or after you run partprobe(8) or kpartx(8).
Then run sudo shutdown -r now on the Pi, wait for the Pi to shut down, and quit QEMU. The next step is to fsck and resize the filesystem on that partition.
To do this, I copied piaware.img to a Linux laptop. (At this point, I began reconsidering some of my life choices.) On the Linux laptop, I set up a loop device to let me work with the partition I wanted to resize, then I checked and resized the filesystem:
sudo losetup -o 67108864 /dev/loop1 piaware.img
# the magic number 67108864 is the starting sector for that partition (131072) times the number of bytes per sector (512)
sudo e2fsck -f /dev/loop1
sudo resize2fs /dev/loop1
Use sudo losetup -d /dev/loop1 to delete the loop device. Finally, copy piaware.img back to the host Mac; try running it via QEMU again and verify that df -h reports a healthy amount of free space on the Pi:
pi@piaware:~ $ df -h
Filesystem      Size  Used Avail Use% Mounted on
/dev/root       5.8G  3.3G  2.3G  60% /
Feeding ADS-B Exchange
[ADS-B Exchange] is the “world’s largest co-op of unfiltered flight data.” Its feeding instructions are also Pi-oriented, so I opted to install the feeder on my emulated Pi. Like FlightAware, ADS-B Exchange will feed MLAT results back to you.
⚠️ Note that the setup script wants your antenna elevation in meters. I’ve submitted a pull request to clarify that.
SSH into the Pi, and run:
git clone https://github.com/jprochazka/adsb-exchange.git
cd adsb-exchange
chmod +x setup.sh
sudo ./setup.sh
Configure the resulting scripts (in ~/adsb-exchange/) to work with the dump1090 client on the host Mac, as follows:
sudo nano adsbexchange-mlat_maint.sh and update localhost references to MAC-HOSTNAME.local:
#!/bin/sh
while true
  do
    sleep 30
    /usr/bin/mlat-client --input-type dump1090 --input-connect MAC-HOSTNAME.local:30005 --lat XXX --lon YYY --alt 255.422 --user <CHOOSE-A-USERNAME> --server feed.adsbexchange.com:31090 --no-udp --results beast,connect,MAC-HOSTNAME.local:30104
  done
sudo nano adsbexchange-netcat_maint.sh and update localhost references to MAC-HOSTNAME.local:
#!/bin/sh
while true
  do
    sleep 30
    /bin/nc MAC-HOSTNAME.local 30005 | /bin/nc feed.adsbexchange.com 30005
  done
Reboot the Pi, and SSH back in and verify those scripts are running:
pi@piaware:~ $ ps -efww | grep -w "adsbexchange-netcat_maint.sh"
root       396     1  0 15:20 ?        00:00:00 /bin/sh /home/pi/adsb-exchange/adsbexchange-netcat_maint.sh
pi         650   639  0 15:24 pts/0    00:00:00 grep --color=auto -w adsbexchange-netcat_maint.sh

pi@piaware:~ $ ps -efww | grep -w "adsbexchange-mlat_maint.sh"
root       395     1  0 15:20 ?        00:00:00 /bin/sh /home/pi/adsb-exchange/adsbexchange-mlat_maint.sh
pi         656   639  0 15:24 pts/0    00:00:00 grep --color=auto -w adsbexchange-mlat_maint.sh
This forum post makes clear that it’s difficult to see whether ADS-B Exchange is receiving data from you properly. One option is to see if you show up in the MLAT sync matrix, which in my experience took a couple of hours.
You might also see some output from ADS-B Exchange’s MLAT client printed on the console in QEMU, which would verify you’re up and running:
Make it persistent
At this point, we’ve already configured the Plane Finder feeder (and FR24, if you opted to install it) to start on login. And we know the PiAware and ADS-B Exchange tools will start when the Raspberry Pi emulator boots. So we just need to make the emulator and dump1090 start at login.
Create one more directory, ~/scripts, to store startup scripts for those tools.
Write this to ~/scripts/piaware-vm:
#!/bin/sh

cd /Users/YOUR-USERNAME/piaware-vm
sudo qemu-system-arm -name "piaware" -kernel kernel-qemu -cpu arm1176 -m 256 -M versatilepb -serial stdio -append "root=/dev/sda2 panic=1 rootfstype=ext4 rw" -drive file=piaware.img,index=0,media=disk,format=raw -net nic,macaddr=54:54:00:54:54:54 -net tap,script=./scripts/tap-up,downscript=./scripts/tap-down
Write this to ~/scripts/dump1090:
#!/bin/sh

cd /Users/YOUR-USERNAME/dump1090
./dump1090 --net --lat <YOUR LATITUDE> --lon <YOUR LONGITUDE> --modeac --mlat --quiet --write-json /usr/local/var/dump1090-mut-data
Run chmod +x ~/scripts/dump1090 ~/scripts/piaware-vm to make those executable.
To allow running QEMU with sudo (necessary for the networking configuration) without typing a password, we need to tweak the sudoers file. Run sudo visudo and add this line at the very end:
ALL ALL= NOPASSWD: /usr/local/bin/qemu-system-arm
This will allow anyone to run the QEMU ARM emulator on that system, with sudo, without a password.
Installing launchd plists
Download these two plists and adjust the paths they reference to include your OS X username (instead of mine, cdzombak). Move them to ~/Library/LaunchAgents.
cdz.dump1090.plist will launch dump1090 on login and restart it if it crashes. cdz.piaware.plist does the same for the PiAware VM.
Load the plists (incidentally, this is a useful launchd reference):
launchctl load -w ~/Library/LaunchAgents/cdz.dump1090.plist
launchctl load -w ~/Library/LaunchAgents/cdz.piaware.plist
Conclusion
Finally, I have a nice dump1090 installation on my always-on Mac; I’m feeding reports to FlightAware, ADS-B Exchange, and Plane Finder; and the first two of those are feeding MLAT results back to me.
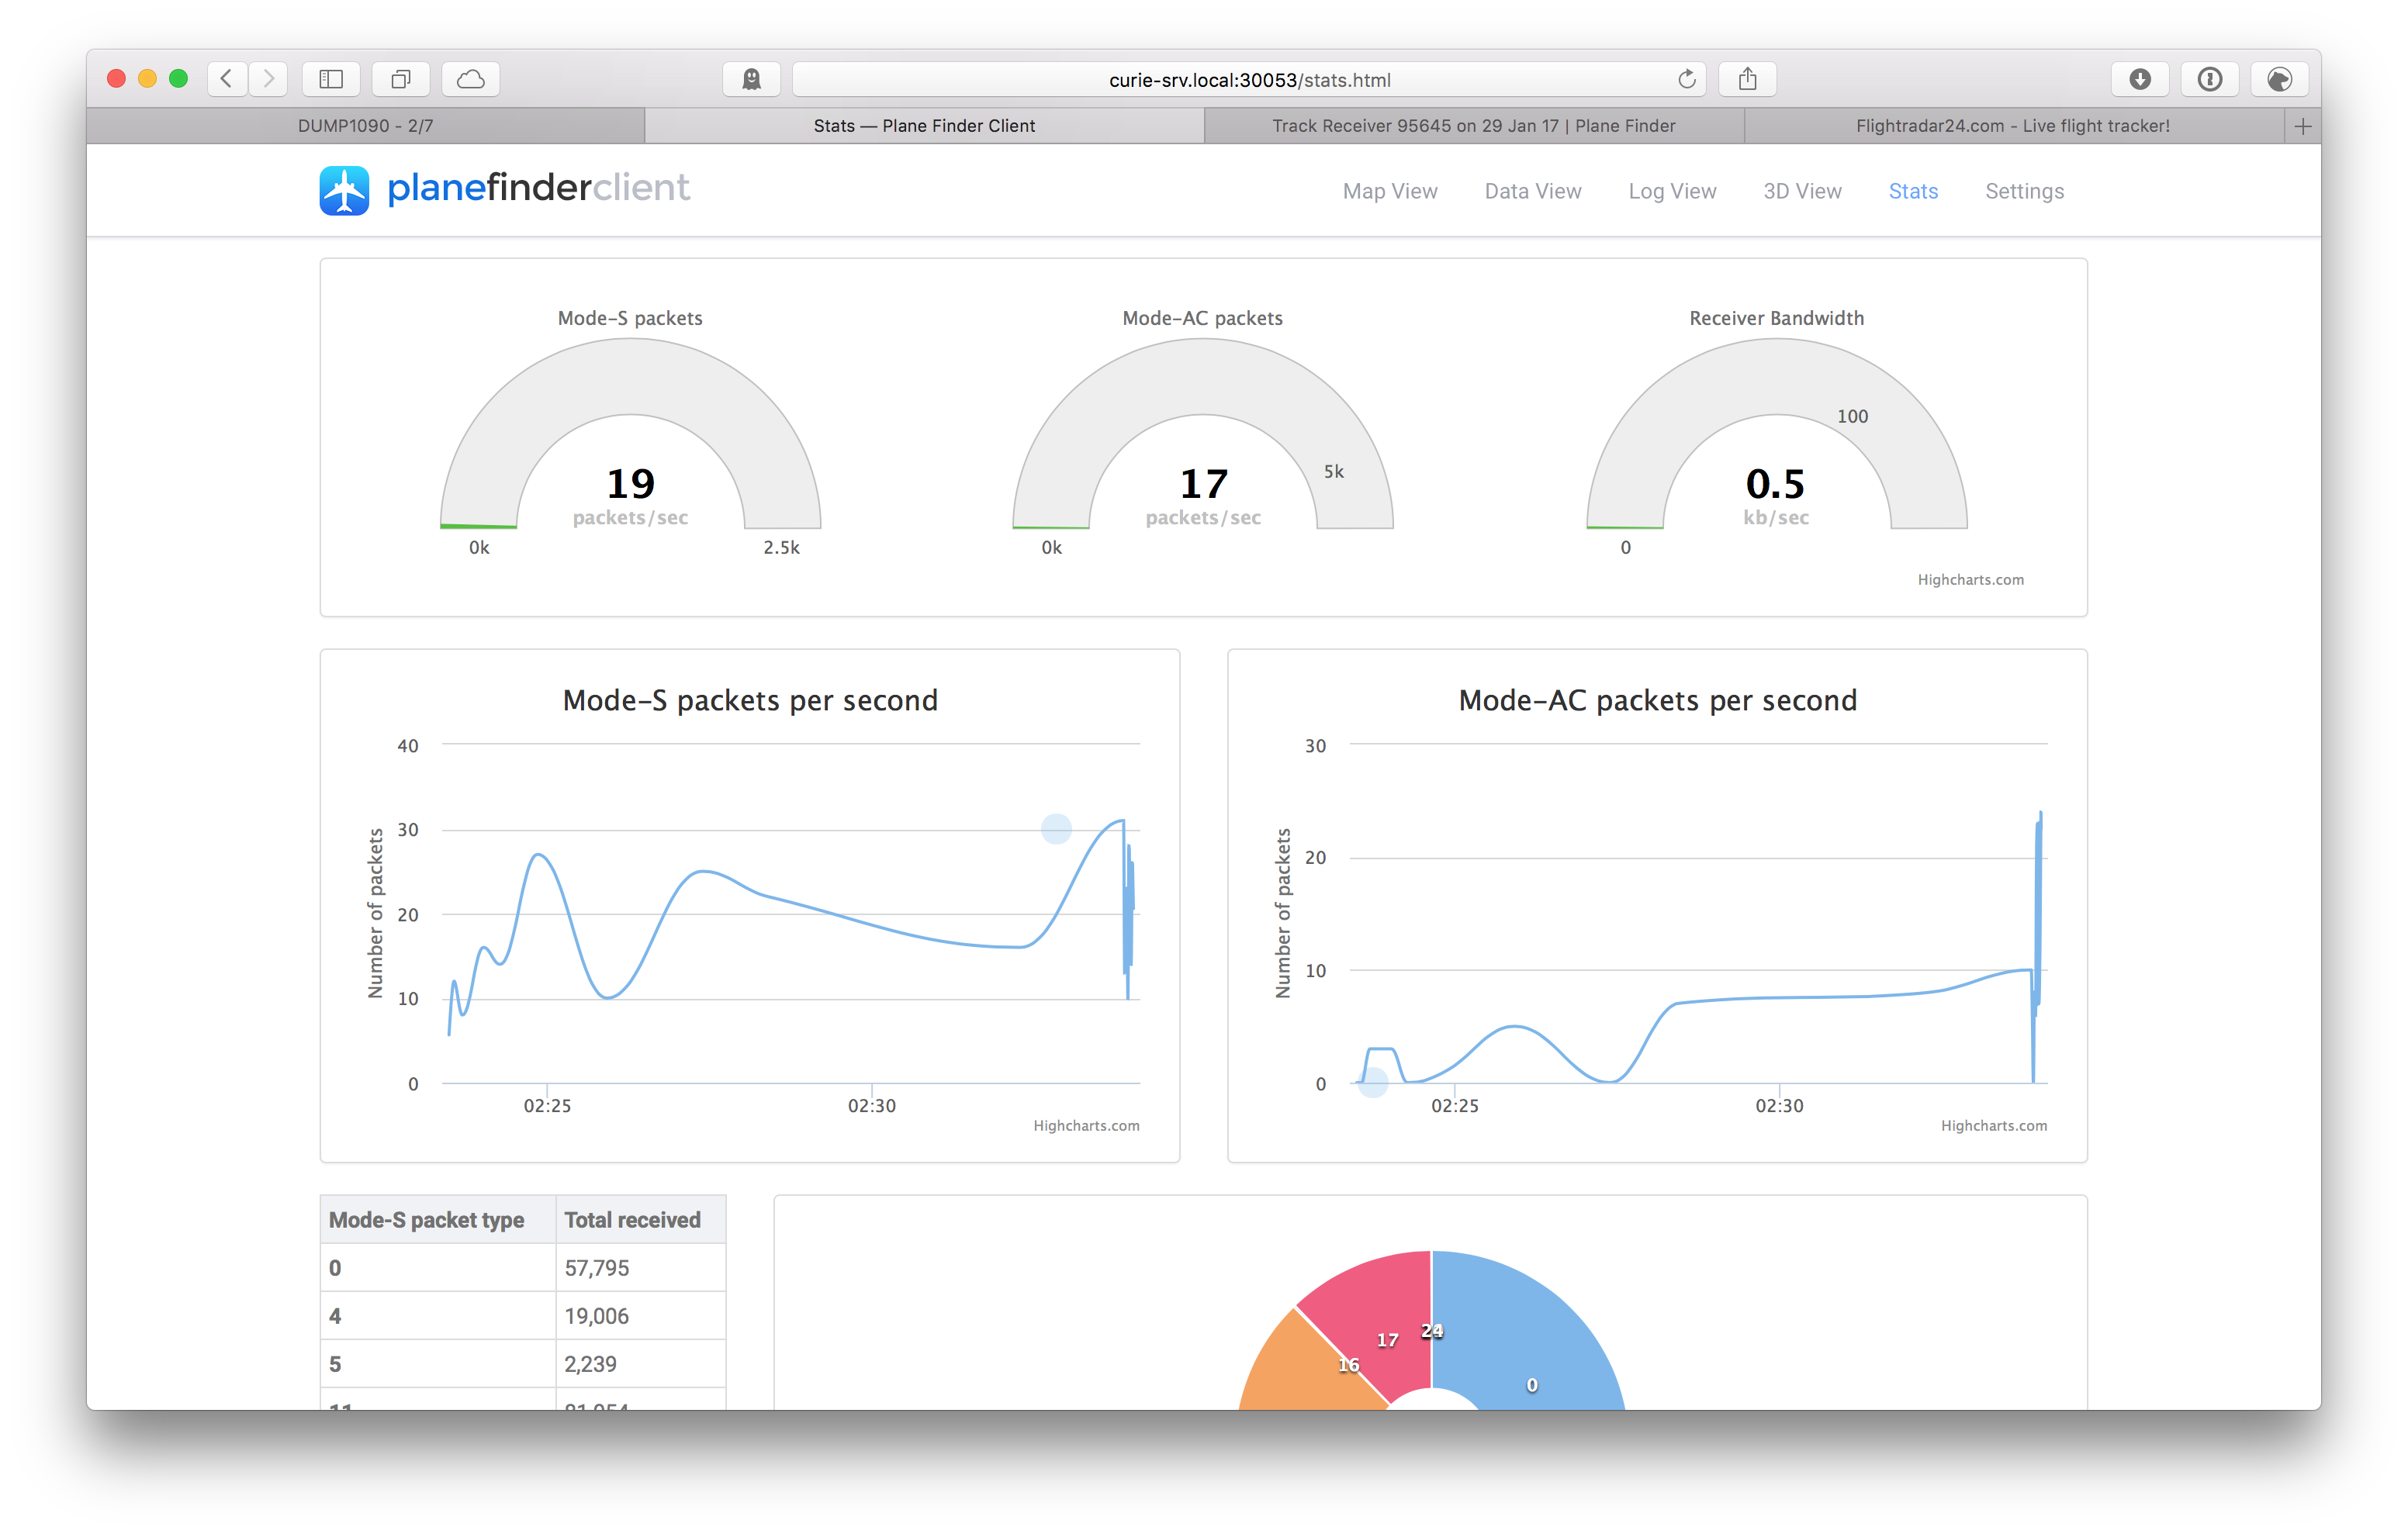
You can see some statistics for this receiver on…
You’ll notice that my reception distances are embarrassing. The ADS-B antenna is currently mounted in a west-facing window. I’m currently renting this apartment, so I’m not sure I can mount something more permanent on the roof. My main interest right now is monitoring interesting aircraft around Michigan Stadium (just a little to my west) during events there, though, so this should be fine.
As always, I welcome discussion and feedback; I’m @cdzombak on Twitter.