PiKVM Build
Part of the Project Logs series.
For the past few years, every once in a while I'd search something like "IP KVM," look at the prices, and remember why I always quickly abandoned this search.
Until sometime earlier this year, that is, when I stumbled across Novaspirit Tech's YouTube video about PiKVM, an open-source DIY IP KVM which promised a total cost under $100. I knew I had to build one!
What is an IP KVM?
A KVM-over-IP device connects to a computer's USB and video output and allows you to control the computer remotely, as if you were sitting in front of it with a keyboard, mouse, and monitor attached. It's commonly used to fix problems when a server drops off the network or its SSH/VNC remote access is accidentally disabled.
I planned to build one that connects to my home network over WiFi. This way, when a Raspberry Pi or other computer runs into trouble, I can just plug the PiKVM into it and debug it, rather than having to lug the Pi and whatever specialized hardware it's using to the basement, clear space for a wired keyboard, and fiddle around with connectors behind my monitor.
Parts
The first step was to collect all the requisite parts. I used the following:
- Raspberry Pi 4, 4GB
- Power adapter, Pi 4 compatible
- SanDisk 32 GB Class 10 MicroSD card[1]
- HDMI to CSI 2 Adapter Board
- USB-C Power/Data Splitter[2]
- Case Fan
- 6-inch USB-C cable[3]
- HDMI cable & USB-C to USB-A cable for connecting the PiKVM to target hosts
- Various screws & nuts for securing things in the case; I think I used M2.5 or M3, but I don't remember exactly
3D-Printed Enclosure
I started this project before getting a 3D printer, so I enlisted a friend to print this case from Thingiverse. But once all the parts arrived, an initial test fitting revealed that this enclosure wouldn't quite work with the particular USB-C power/data splitter board I'd obtained (sorry for wasting your filament, Tim).
I modified it to work with this board, and I added a fan hole on top at the same time. My updated design is available here. By this time, I'd obtained a 3D printer, so I was able to print my updated enclosure design myself:

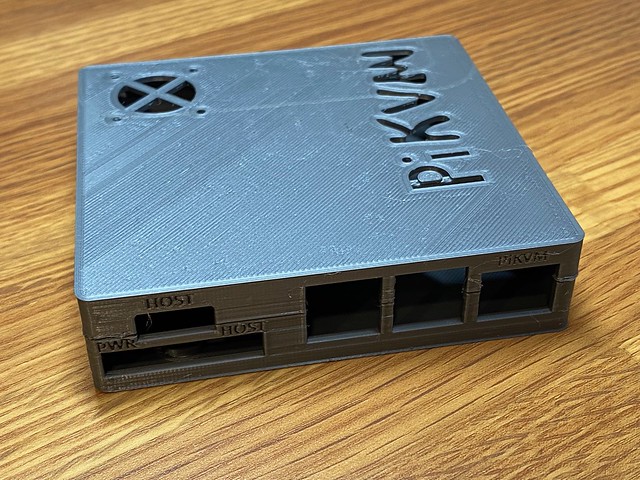
The PiKVM Handbook lists links to a number of other case designs, too.
Hardware
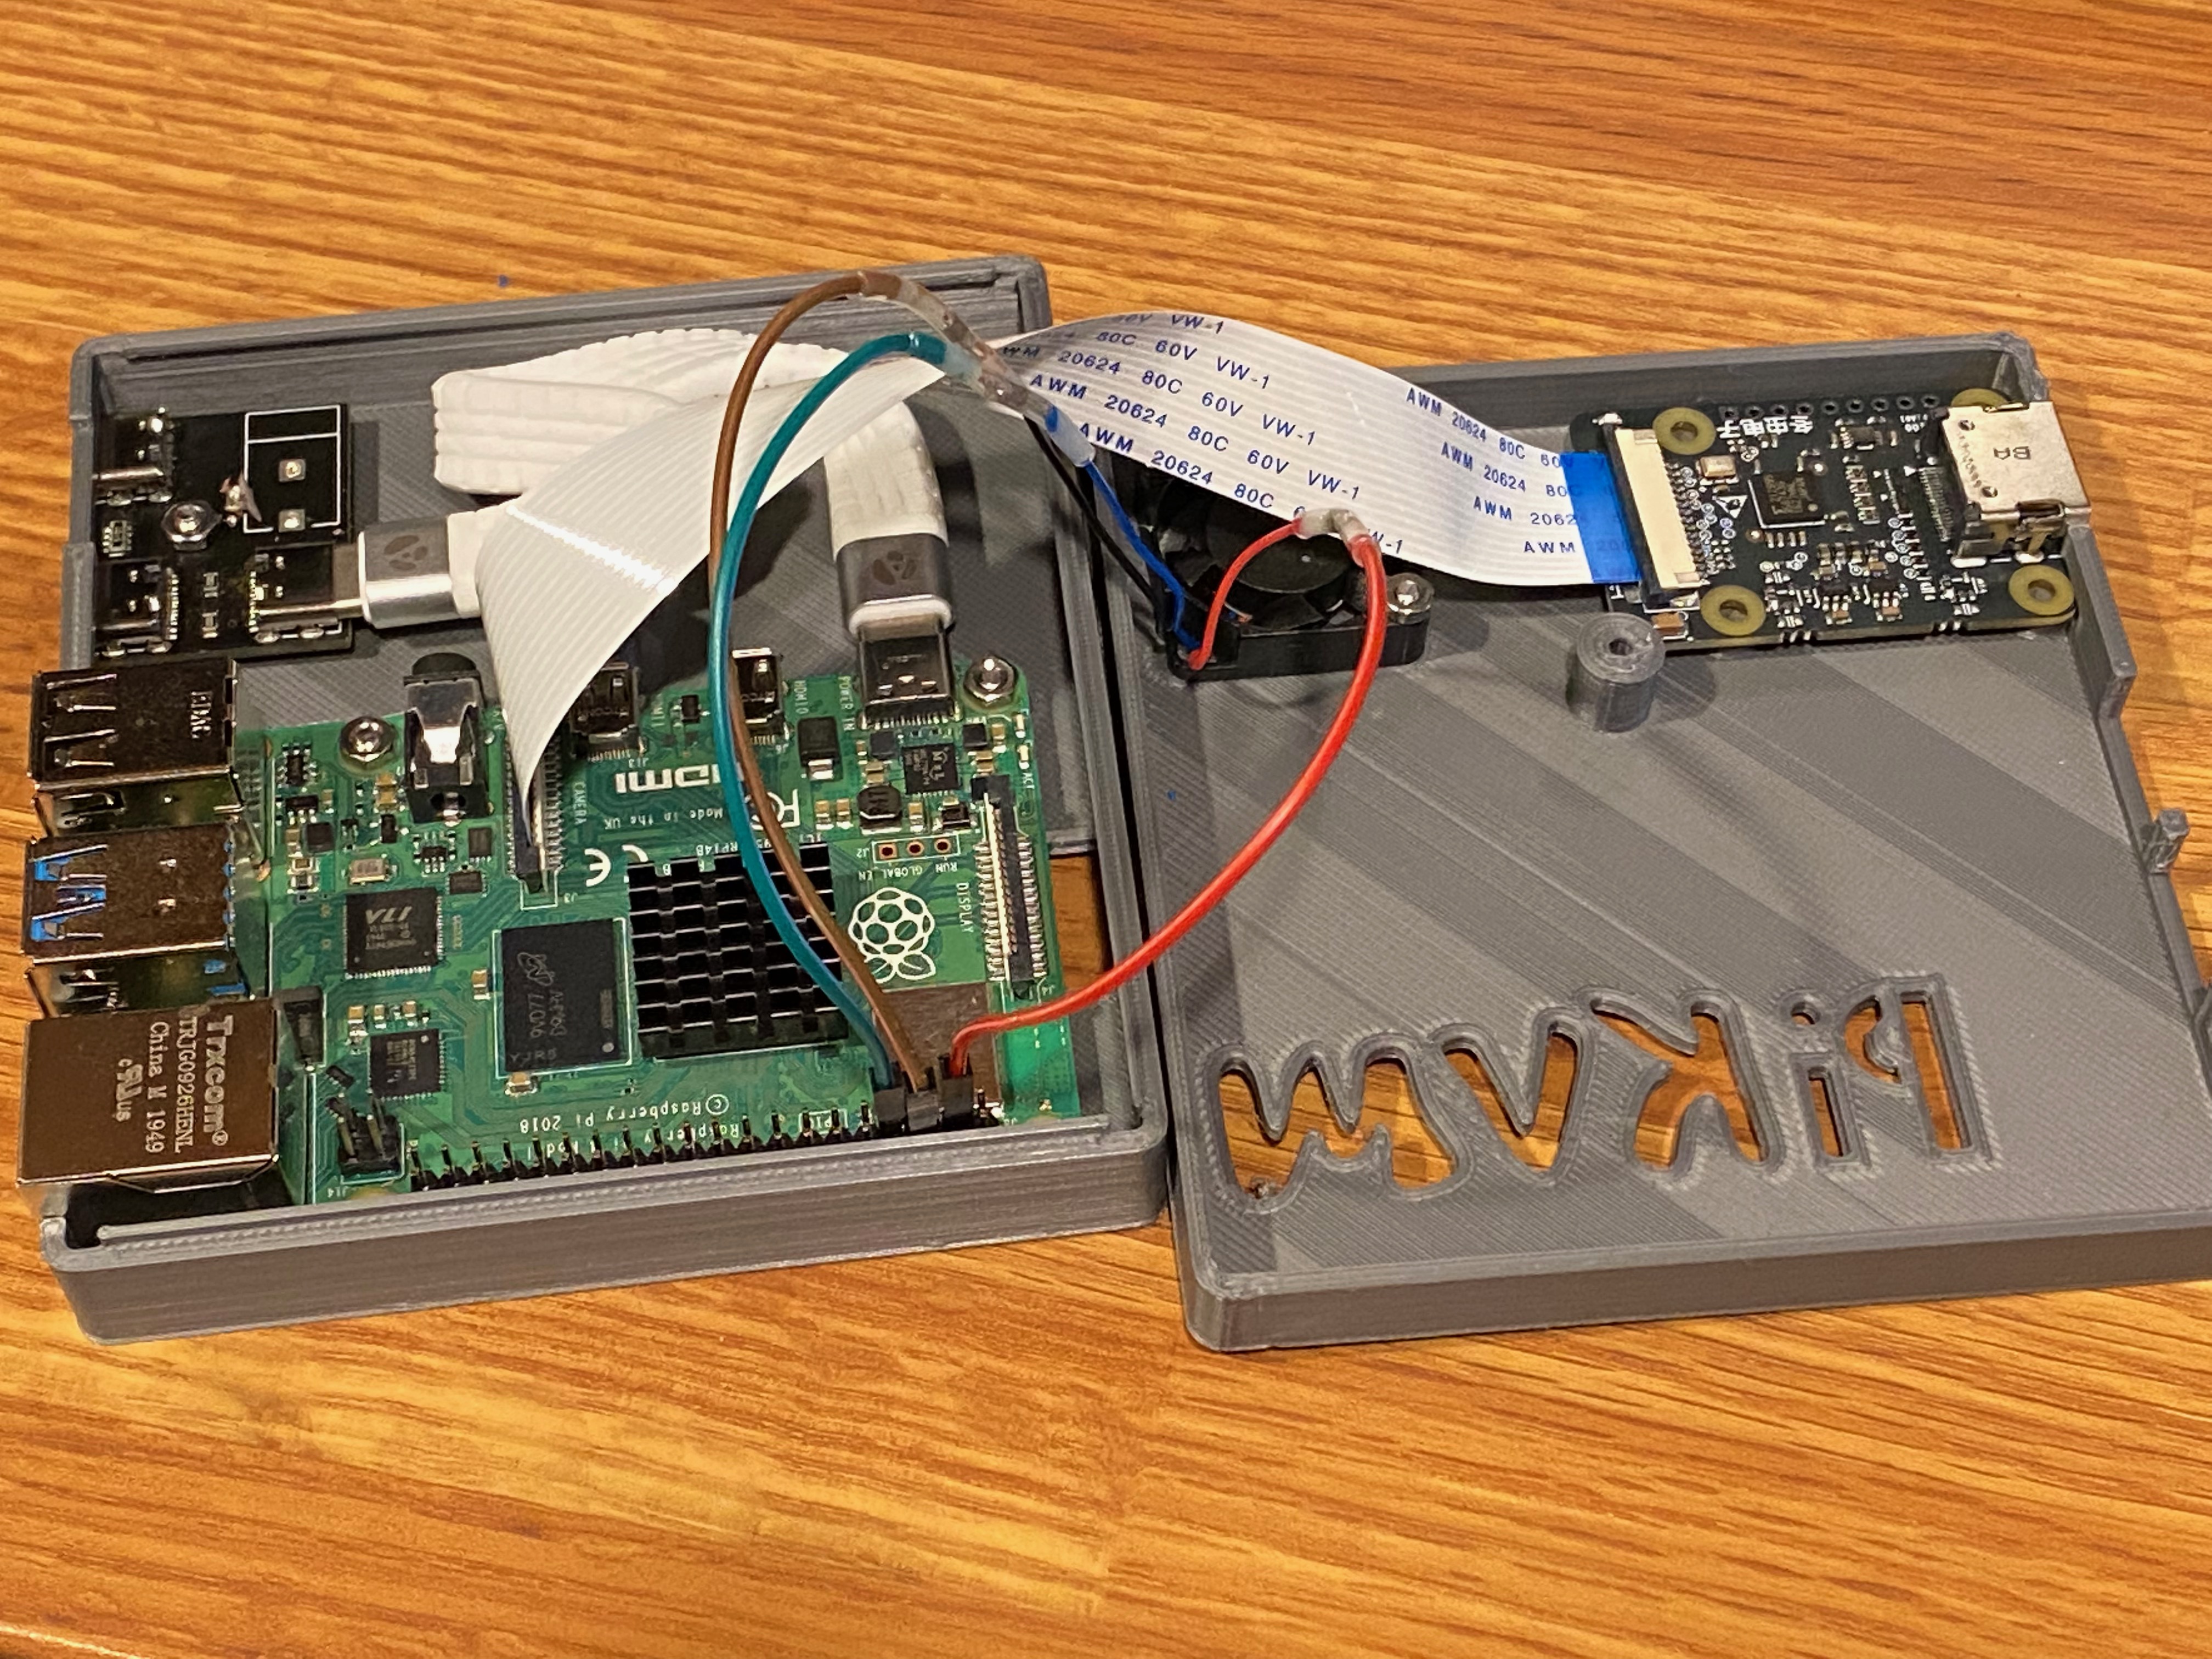
I needed to remove the barrel jack from the USB power splitter board to make it fit nicely into the enclosure below the HDMI adapter board. I tried desoldering it, but it seemed like there might be a large ground plane in the board which sucked up a lot of heat — or maybe I'm just a novice de-solderer. In any case, I settled on doing some very careful work with a Dremel tool, which worked.
I then got all the pieces — power splitter board, USB cable, HDMI board, CSI cable, and fan — mounted in the case and wired together. The PiKVM DIY guide has instructions on hardware assembly.
At this point, the project looked like this:
Note: Consider skipping the fan
You'll note that I had to extend the fan's wires slightly, and I didn't have color-matched wires immediately handy. The Pi 4 Case Fan page has instructions on wiring.
The case fan ended up making an incredible amount of noise when I assembled the project. I think this is because the internal USB cable was thick and excessively long. If I did this project again, I would spend extra time and effort to find or build a thinner, shorter USB-C cable. But I needed to finish this project, so for now I've just unplugged the case fan. The Pi seems happy enough, so maybe you shouldn't bother including a fan in your build.
Software
I downloaded the v2-hdmi-rpi4-latest.img.xz image from the PiKVM downloads page, and flashed it to the MicroSD card using balenaEtcher. You could also use the new Raspberry Pi Imager software; see the PiKVM page on flashing the OS for details.
The next couple steps are from the PiKVM First Steps guide, which I encourage you to read.
I wanted the PiKVM to connect via WiFi. To accomplish this, on the MicroSD card's first partition, I edited pikvm.txt to add:
FIRSTBOOT=1
WIFI_ESSID="my_wifi_network"
WIFI_PASSWD="my_wifi_password"
Change passwords
Per the PiKVM first steps document, one of the first things you should do is change the default passwords. SSH in via ssh root@pikvm.local, or root@<piKVM IP> if your network doesn't use mDNS. Then, logged in as root:
rw
passwd root
kvmd-htpasswd set admin
ro
The first password is the new password you'll use to SSH into the PiKVM, via ssh root@pikvm. The second one (kvmd-htpasswd set admin) is the password used to login to the PiKVM web UI (with the username admin).
Run a software update
rw
pacman -Syu
reboot now
Clear the package cache
rw
pacman -Sc && rm -rf /var/cache/pacman/pkg
ro
Disable "ATX" menu
I opted not to add ATX control hardware to my PiKVM, so I wanted to hide this menu in the web interface. To do this, first change to read-write mode with the rw command, and then edit the /etc/kvmd/override.yaml to include this YAML:
kvmd:
    atx:
        type: disabled
Wen you're done, switch back to read-only mode using the ro command.
Enable using WebRTC video
For more details on this, see H.264 / WebRTC in the PiKVM Handbook.
rw
systemctl enable --now kvmd-janus
ro
Enable VNC
Using VNC in the PiKVM Handbook covers this in more detail, including instructions on setting up a non-US keymap. This is what I did to set up VNC on my PiKVM.
Change to read-write mode with the rw command, and then edit the /etc/kvmd/override.yaml to include this YAML:
vnc:
    auth:
        vncauth:
            enabled: true
Edit /etc/kvmd/vncpasswd to set the VNC password. To the best of my recollection, classic VNC authentication uses only a password (no username), and the password is limited to 8 characters in length.
VNC authentication is not secure, and you should not enable VNC if this PiKVM is to be accessible from the Internet.
/etc/kvmd/vncpasswd will map the VNC password to the admin password you set earlier, via kvmd-htpasswd set admin. The file's content should look like this:
vncpass -> admin:pikvmpasswd
Enable the VNC service:
systemctl enable --now kvmd-vnc
Finally, switch back to read-only mode with ro. You should now be able to use a VNC client like TigerVNC to connect to your PiKVM. (I use Screens, the same app I use to remote-control other macOS, Windows, and Linux machines around the house.)
Set server metadata
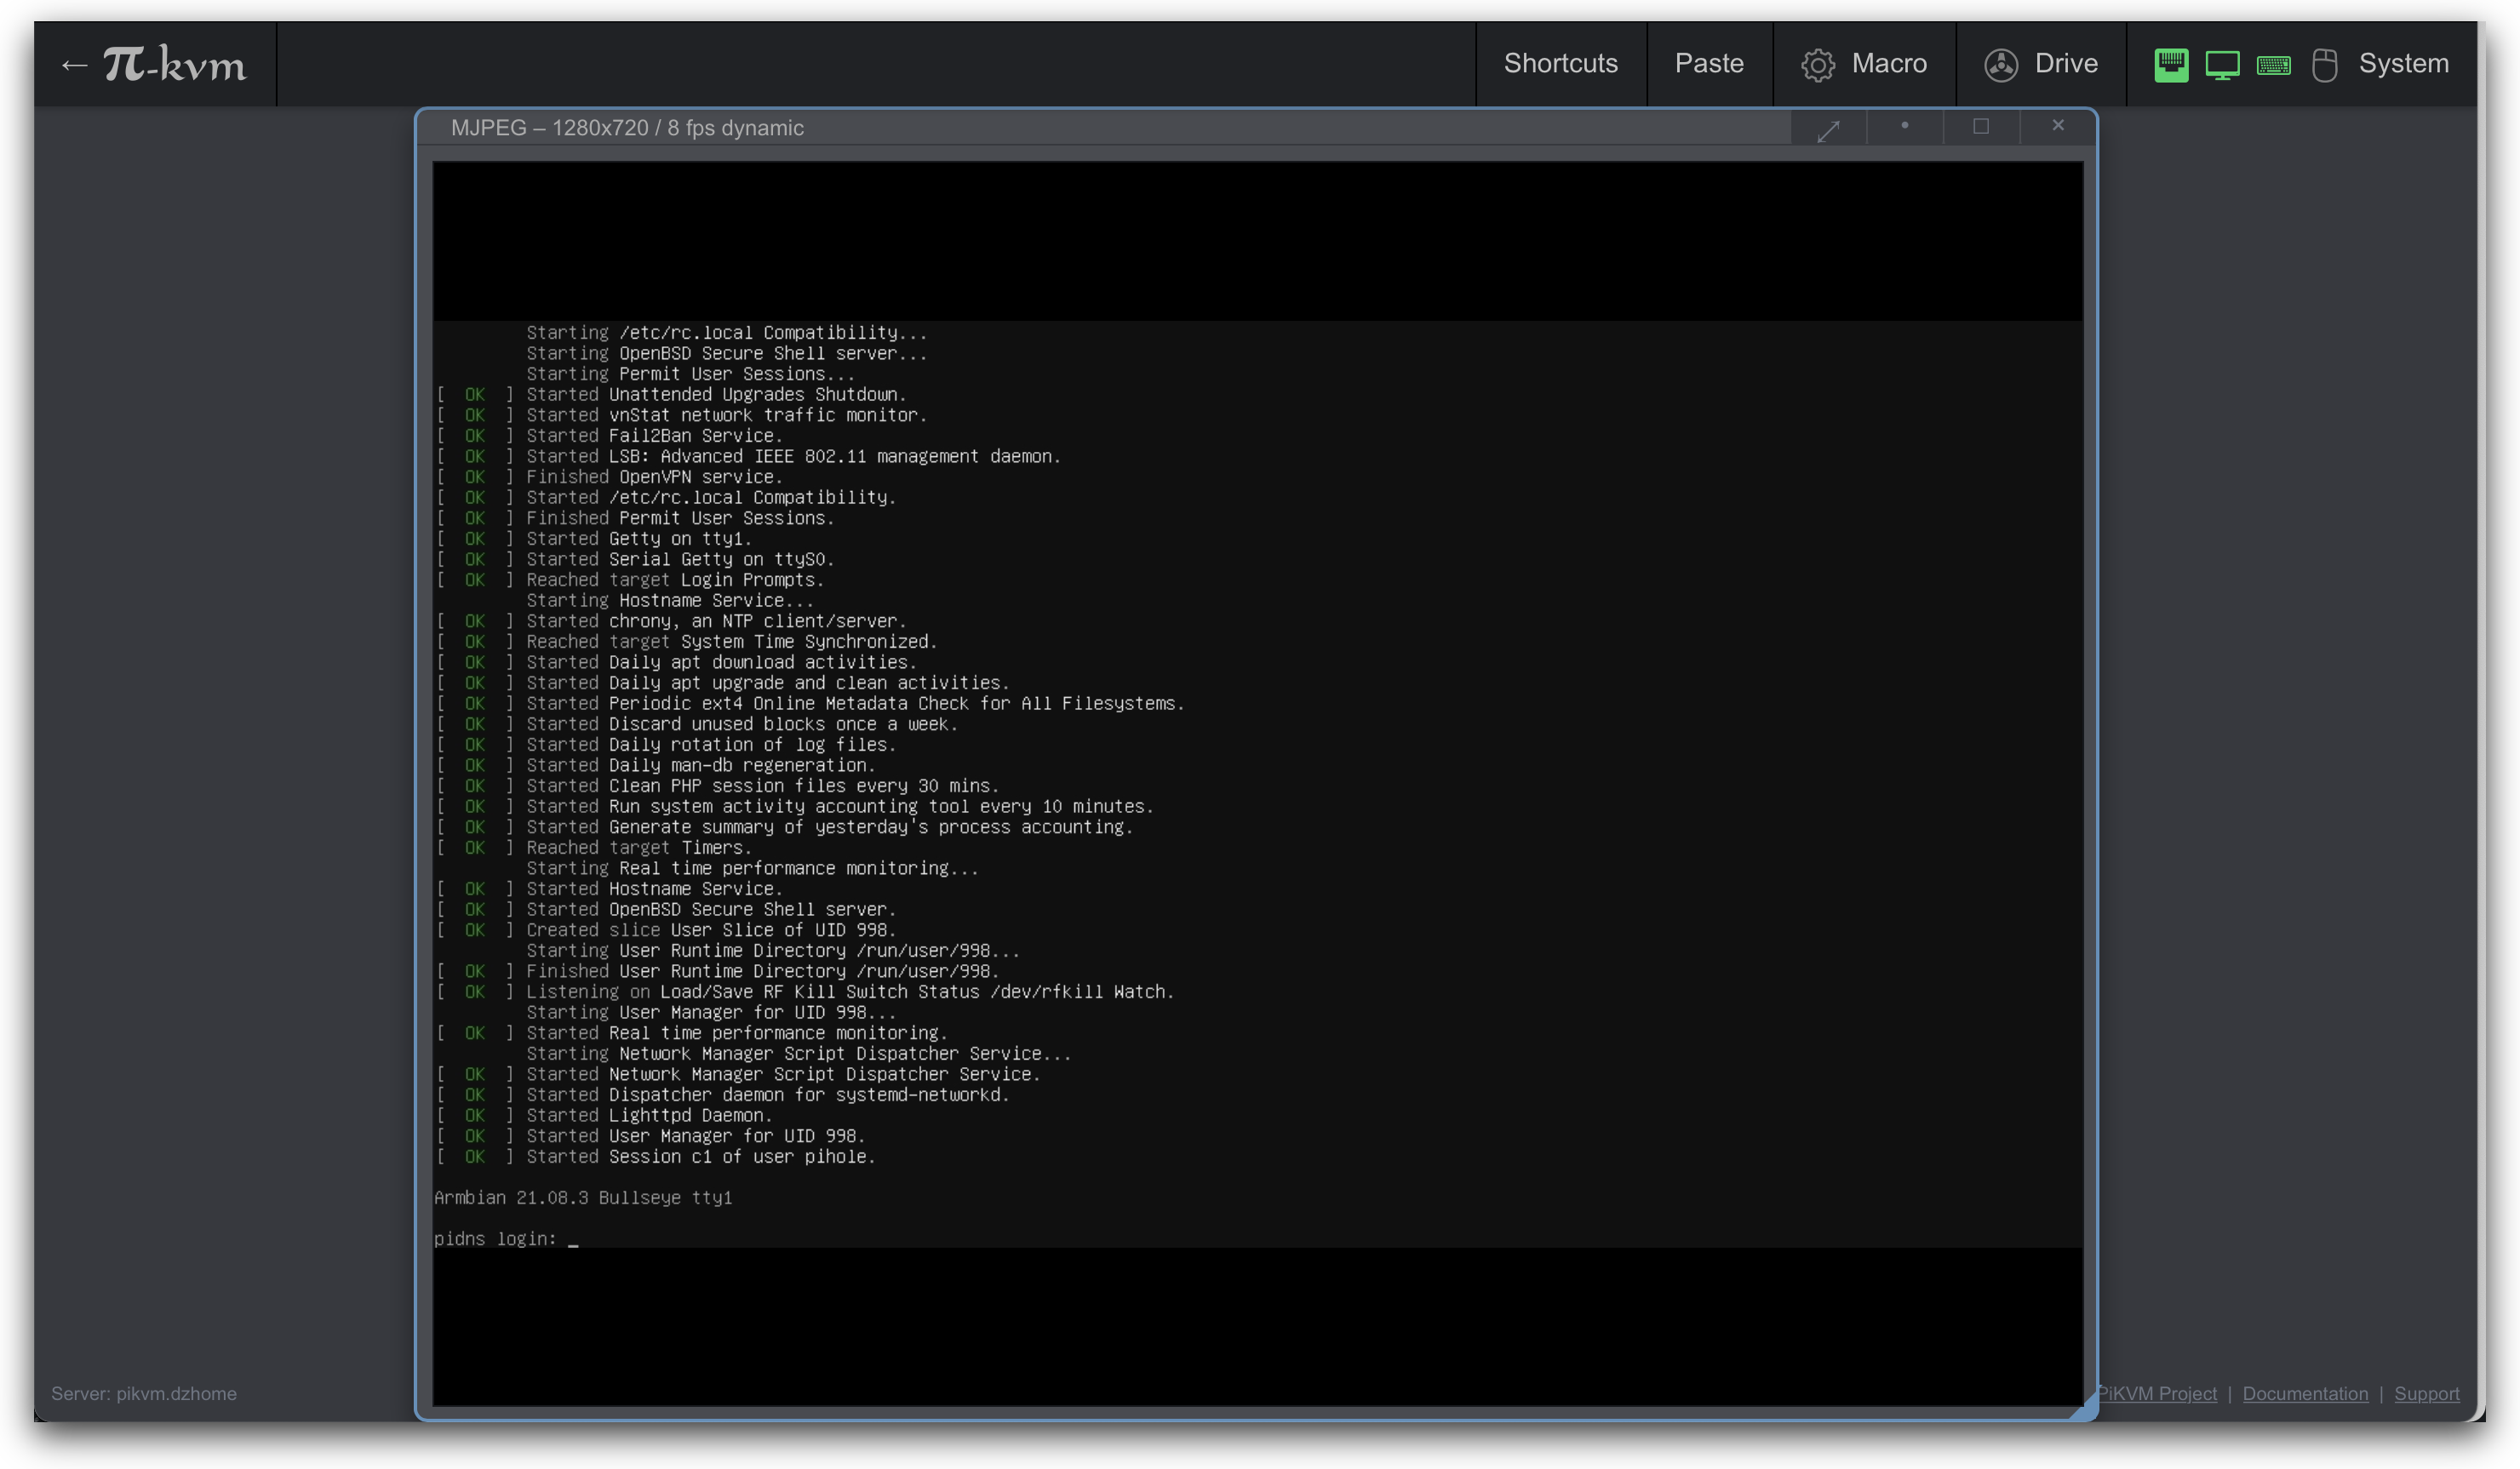
The PiKVM user interface displays the name of the server you're logged into:
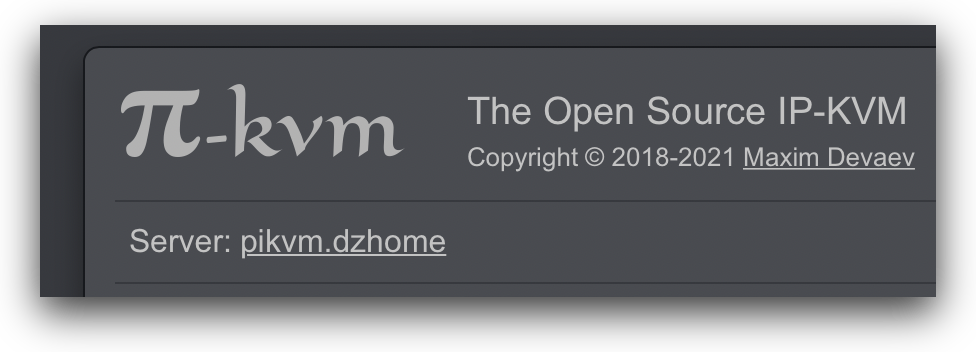 You can set this by switching to read-write mode (
rw) and editing /etc/kvmd/meta.yaml. After customizing it, the file should look like this:
# You can write down any information and it will be available
# at the address /api/info (if you use default nginx config).
# If server.host (str) will be defined then this value
# will be displayed in the web interface.

server:
    host: pikvm.dzhome

kvm: {}
As always, use ro to switch back to read-only mode when you're finished editing.
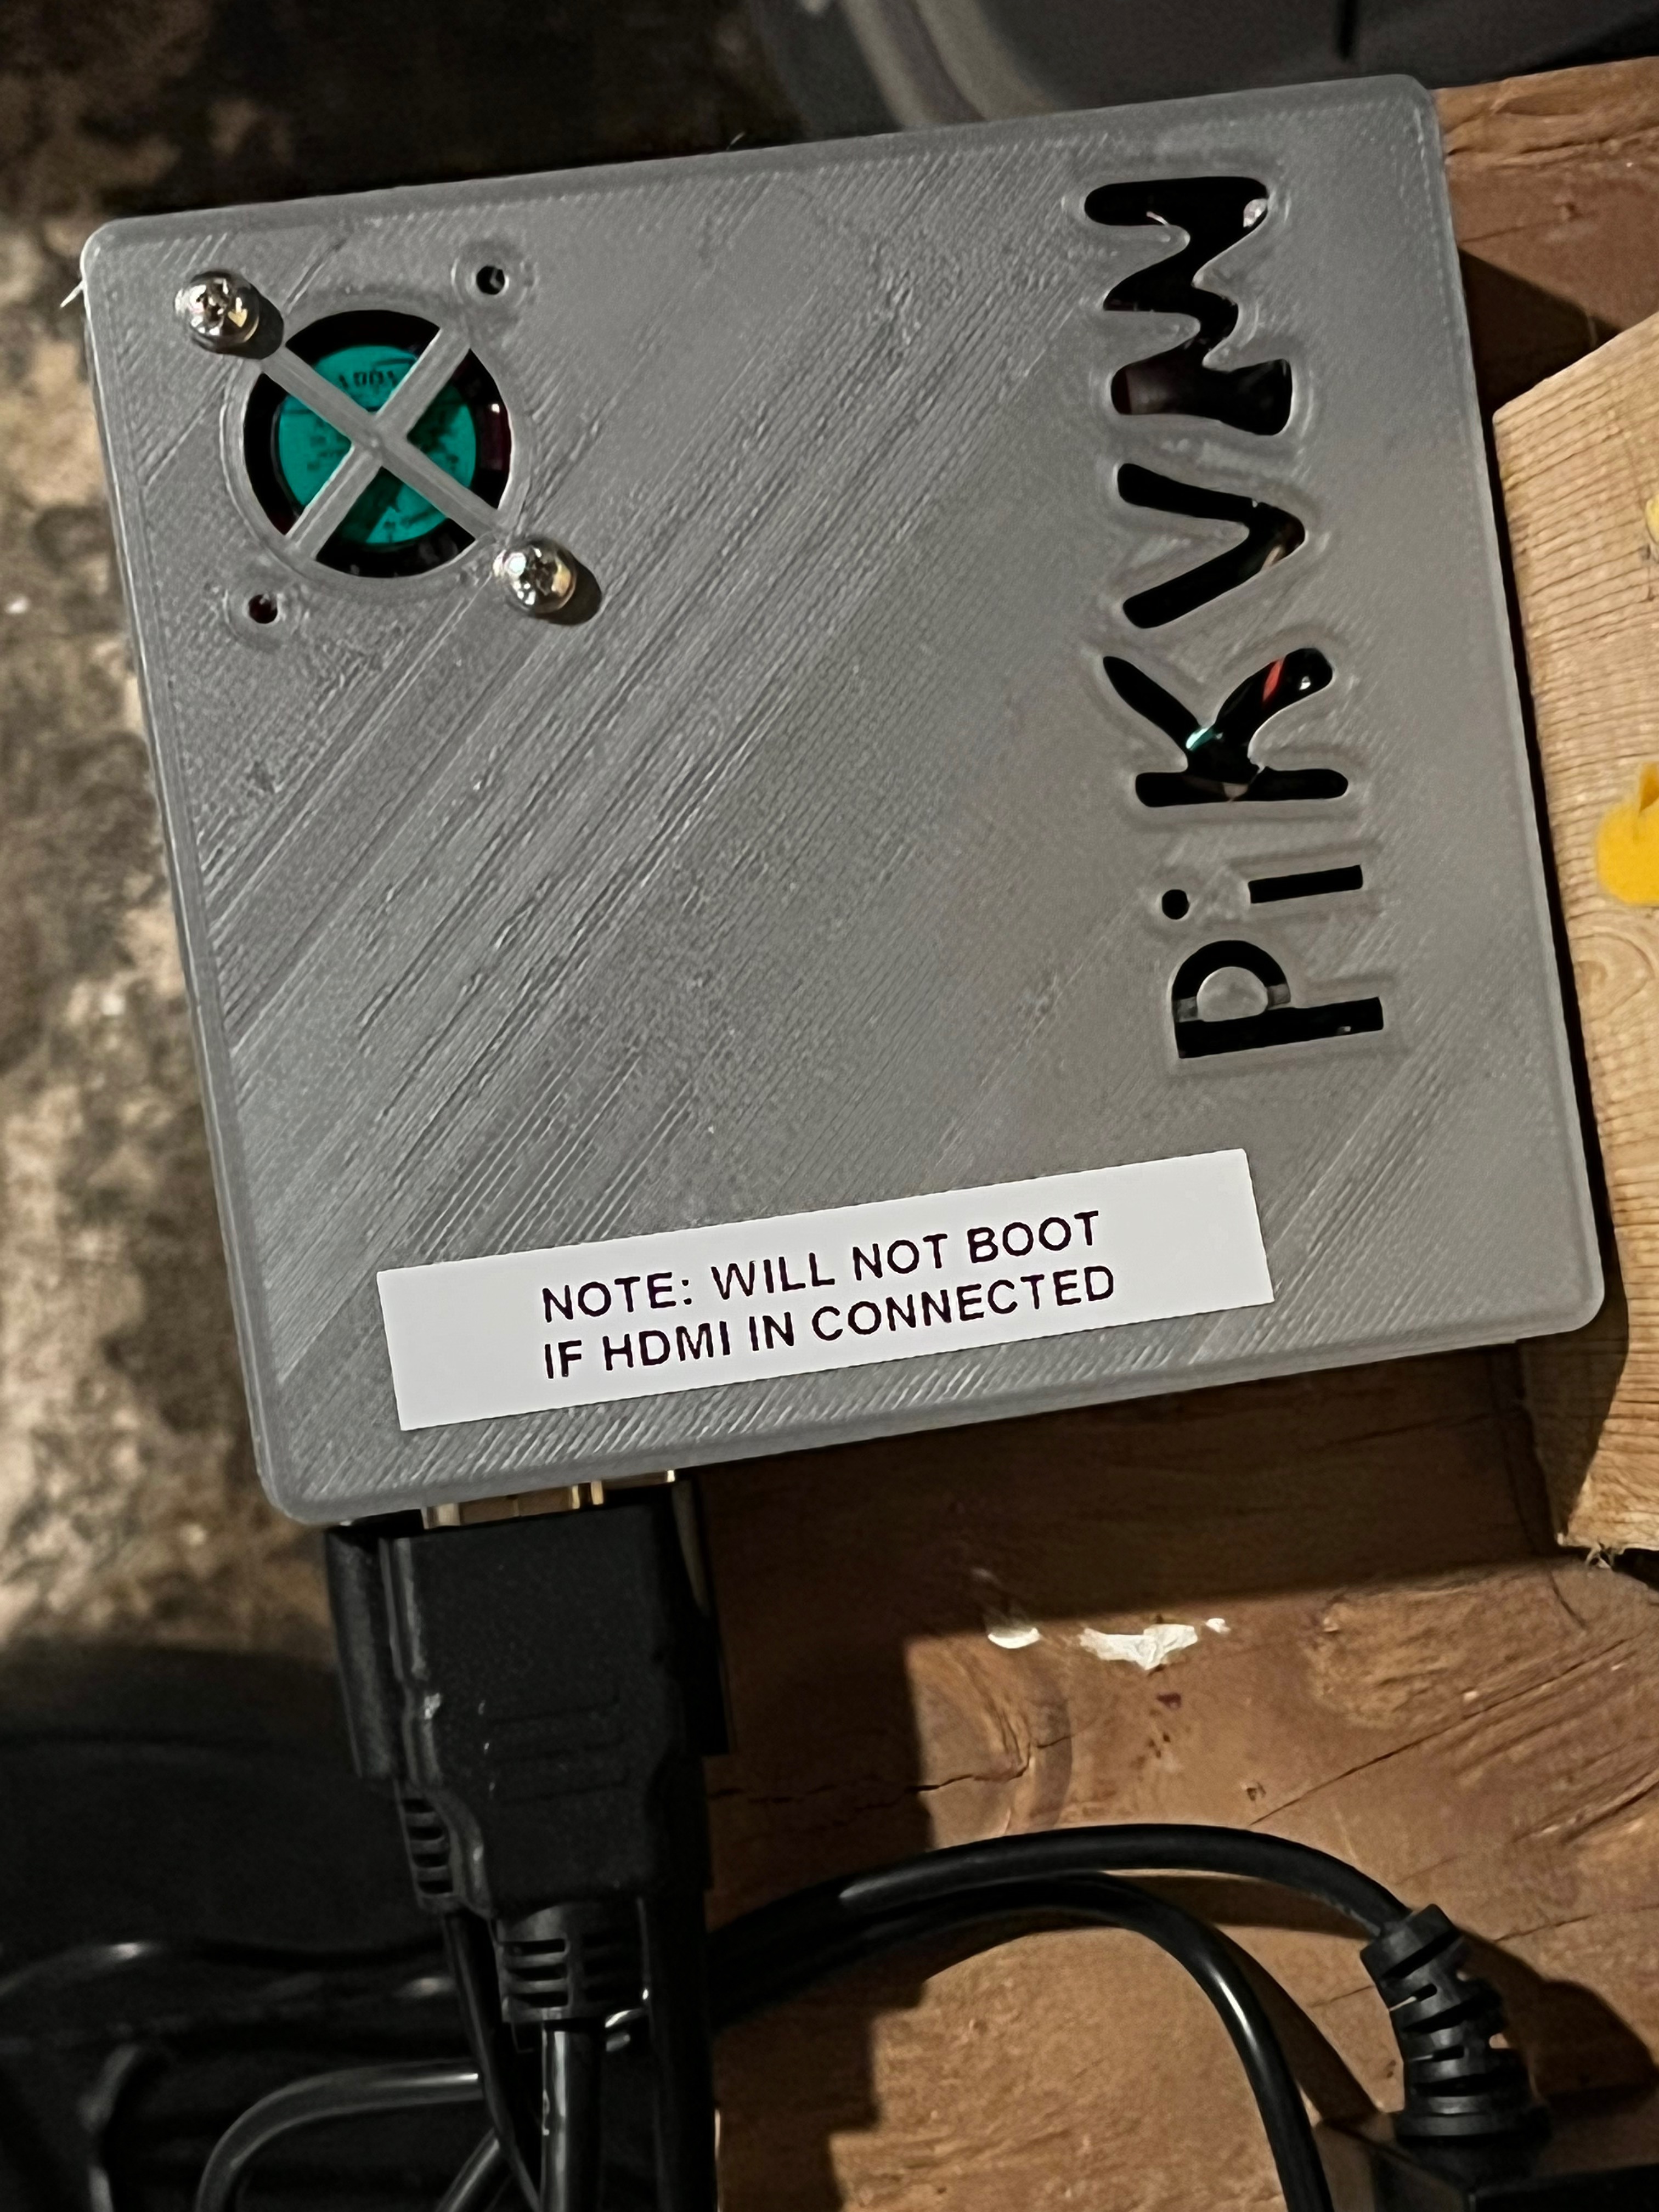
PiKVM won't boot if HDMI input is connected
I've noticed that the PiKVM won't boot if I have already connected it to an HDMI input. I can find some references to similar problems online (eg. 1, 2). Allegedly this only happens when connected to some devices; I've observed it when connecting to a Raspberry Pi 3B+, Orange Pi PC, and my x86-based home-built NAS.
Since I wanted to finish this project, and I couldn't find any real fixes online after some searching, I decided on a two-pronged fix:
- Add a label reminding me that the PiKVM needs to boot before I connect an HDMI input
- Add a script that texts me when PiKVM comes online, and I can safely connect an HDMI input
The label looks like this, complete with an embarrassing typo:
For the "notify me when PiKVM comes online" feature, I first switched to read-write mode with rw. Then, I wrote this small script to /root/boot-sms.sh:
#!/usr/bin/env bash
set -eu

SMS_TO="+1..."
TWILIO_NUMBER="+1..."
TWILIO_ACCOUNT="..."
TWILIO_APIKEY="..."

curl -s -X POST https://api.twilio.com/2010-04-01/Accounts/$TWILIO_ACCOUNT/Messages.json \
	--data-urlencode "From=$TWILIO_NUMBER" \
	--data-urlencode "Body=PiKVM is online." \
	--data-urlencode "To=$SMS_TO" \
	-u $TWILIO_ACCOUNT:$TWILIO_APIKEY > /dev/null
(If you're following along, you'll need to fill out the SMS_TO variable with your phone number, and fill out the three TWILIO_* variables with your Twilio account information.)
I ran chmod +x /root/boot-sms.sh, and then tested it by calling the script: /root/boot-sms.sh.
Then, I wrote a systemd unit file to trigger the script when the system comes online. This is /etc/systemd/system/boot-sms-notification.service:
[Service]
Type=oneshot
ExecStart=/root/boot-sms.sh
RemainAfterExit=yes
User=root
Group=root
RestartSec=15
Restart=on-failure

[Unit]
Wants=network.target
After=network.target nss-lookup.target

[Install]
WantedBy=multi-user.target
Finally, I enabled the new service:
systemctl daemon-reload boot-sms-notification.service
systemctl enable boot-sms-notification.service
And rebooted the PiKVM to verify that I got a text when it came back online. It took 38 seconds from the time I turned on the power to the time I received the text message, which isn't too bad IMO.
With this in place, I just need to plug the PiKVM into power and wait for a text telling me it's safe to connect the HDMI input.
Because of this bug, I decided not to add network status monitoring script. On other Pis, I have a script that checks for network connectivity every five minutes and reboots the Pi if it's offline. This is particularly useful with the Pi Zero W, which seems to drop off WiFi occasionally. But, with this HDMI bug, if PiKVM does truly drop offline I’d need to visit it manually & unplug the HDMI input, anyway.
Results!
The HDMI input issue makes for kind of a disappointing end to an exciting project, to be honest. But overall, it's still a very useful tool; I've used it several times already.
Reference Materials
32GB is overkill, but the cost was effectively the same as a smaller card. ↩︎
This is theoretically available from US suppliers, but Pimoroni was the only place that had it in stock. ↩︎
This USB cable is pretty thick, which was an issue with the fan; for a future build I'd find or build a thinner and shorter USB-C cable. ↩︎