TDS220 Oscilloscope Refurbishment: Rotary Encoders & Backlight
Part of the Project Logs series.
For years, my oscilloscope has been a Tektronix TDS220 (2-channel, 100 MHz) scope. I bought it used, fairly inexpensively, a little while after graduating from college. (You'll see some photos of this scope's screen in my atomic clock project post.)
It works well, but it had two problems. Most importantly, the time scale ("seconds/div") knob's rotary encoder had always been flaky. Sometimes just touching it caused the time scale setting to jump around; other times it took a lot of spinning to convince it to notice a change. And more recently, the backlight had started to fade.
These are apparently both common issues with this scope. Last weekend, thanks to some helpful YouTube videos and EEVBlog threads, I was able to fix both issues in about an hour of work. This post discusses that process and refers to the sources I used to plan and execute this project.
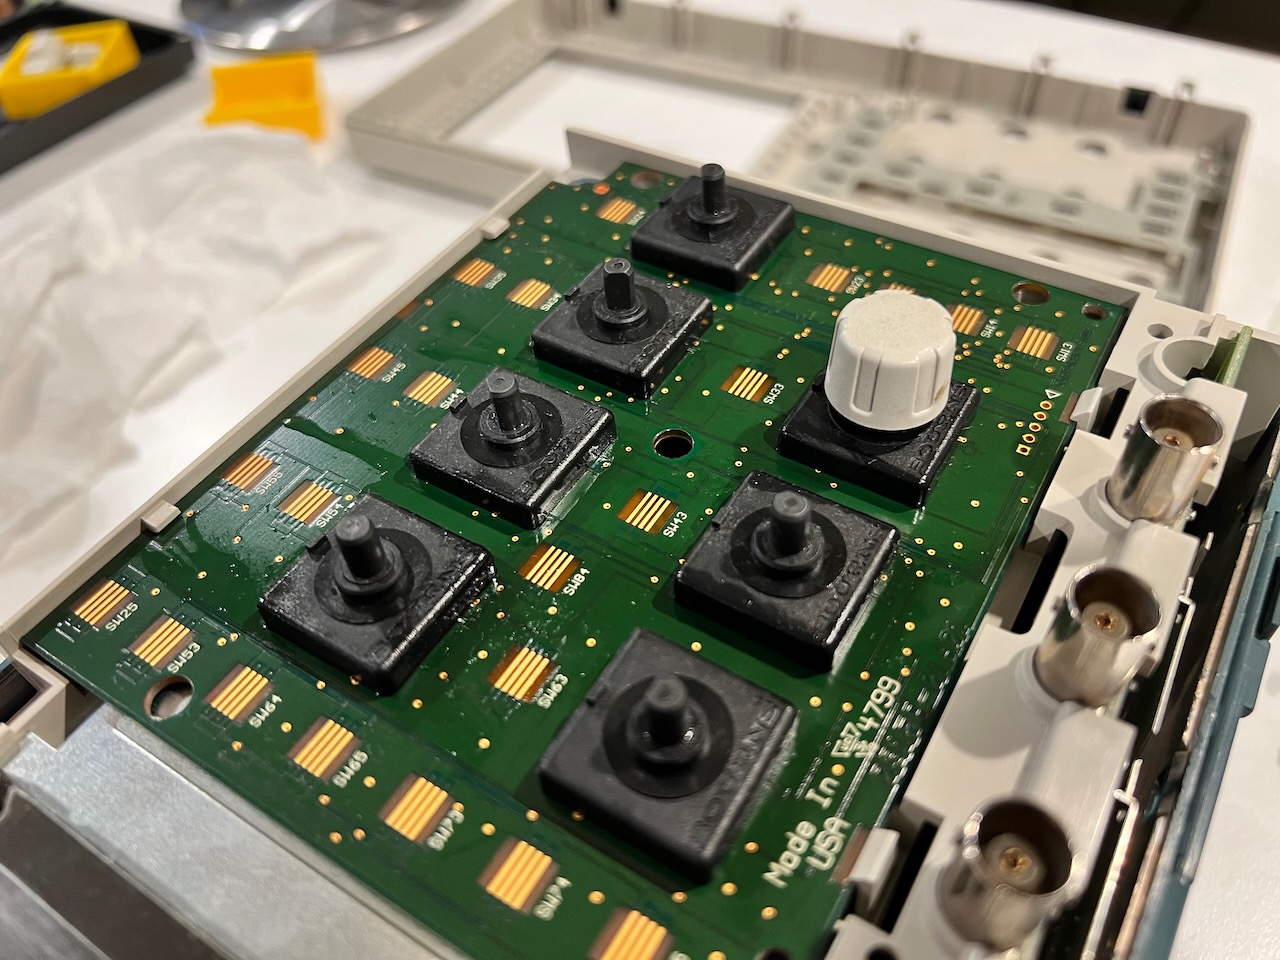
Opening the Oscilloscope
I removed the front knobs, handle, and power button; and then opened the scope's case, following this YouTube video. This was remarkably easy, as was putting the scope back together when I was finished.
The only information I have to add is that, at least on my scope, the two screws used on the top of the enclosure are T15 screws. The appropriate driver bit is included in my preferred precision screwdriver kit, the iFixit Mako Driver Kit.
Cleaning the Rotary Encoders
These encoders are not (non-destructively) removable or replaceable, but several EEVBlog commenters suggested it's possible to get electrical contact cleaner inside around the base of the encoder's housing or around the encoder's shaft.
So, with the front panel board facing up, I sprayed a small amount of contact cleaner w/PPE[1] at the base of the problematic encoder, at a shallow angle to the PCB. I wanted to ensure the best possible chance of the cleaner wicking through the small gap between the encoder's plastic housing and the PCB. I also placed a drop of contact cleaner at the joint between the encoder's shaft and the housing, and allowed that to wick down into the encoder.
After letting the cleaner sit for a minute, I temporarily replaced the encoder's knob and spun the encoder around in both directions for a minute or two:
I repeated that procedure with the other rotary encoders, too, for good measure.
When I'd cleaned each encoder, I wiped all accessible excess cleaner with a paper towel. Then, I used some canned air to spray remaining cleaner out from the base of each encoder, and cleaned everything with a paper towel again. I repeated until the vast majority of the contact cleaner was gone.
References (rotary encoder issues & cleaning)
- EEVBlog Forum: TDS3000B TDS3054B strange type rotary encoder repair/replacement
- EEVBlog Forum: Rotary Encoders for TDS210
Replacing the Backlight
I followed this YouTube video to remove the screen and replace the CCFL backlight. The process was very easy. I didn't use wire cutters as shown in the video; it was easy to desolder the lamp and solder the replacement in its place.
For the replacement, I used this 2.6x100mm CCFL.
Conclusion
I replaced the screen and reassembled the oscilloscope, powered it up, and it worked flawlessly. All the rotary encoders work perfectly, and the backlight is noticeably brighter.
All in all, this cost me under $40 and two or three hours of time (including research). Well worth it!
For Sale
I've also recently acquired a 4-channel oscilloscope, so now that this TDS220 is working well again, I plan to sell it. If you're interested, please get in touch.
This step was carried out with adequate ventilation and protective gloves. ↩︎